In this article we are going to make a swift app for the Mac OSX. This will have no window but instead have a menu item that would be used for interacting with the application. This application shall also read a settings and alter the icon and menu according to the status of that setting
Topics of Learning
- Make a Mac OS X app with Swift
- App without a ViewController or Window
- App in the menu bar
- Change the menu icon
- Read application settings
- Update menu accordingly
Inspiration
I must admit that the idea for this stemmed from a blog post I came across, where the author wrote about the various tools they have written for their own personal use. There was no corresponding source code or idea behind how to achieve the same, so it got me to quickly replicate that functionality and make it available for you.
Making a Mac OS X App with swift
This is the easiest task, start Xcode and select the Cocoa Application template and Click Next. Type in a Product name like “MenuApp”, set the language to Swift and make sure that the Use Storyboards is checked and the Create Document-Based Application and Use Core Data are both unchecked and Click Next and save the Project.
![[2015-05-30055042] -Xcode](https://swift.oz-apps.com/wp-content/uploads/2015/05/2015-05-30055042-Xcode.png)
This project when run will display a window on the screen with a menu that has all of the File, Edit, View etc menu items.
Removing the ViewController and the Window
We want to achieve something that has no Window on the screen and we will do so by removing the ViewController.swift. Add a new file from the User Interface group of type Main Menu. This adds a MainMenu.xib file to your project and a full fledged menu. Click on the MenuApp to see the project settings and select the MenuApp target, under the Deployment Info select MainMenu as Interface. Now remove the Main.storyboard and the ViewController.swift files.
![[2015-05-30072225] -Xcode](https://swift.oz-apps.com/wp-content/uploads/2015/05/2015-05-30072225-Xcode.png)
Creating a Menu
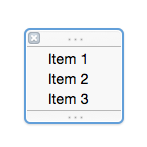
Click on MainMenu.xib and you will see the menu, the full fledged menu with File, Edit, etc. Select this Menu and delete it, as simple as that. The reason for this is we need a menu that is not a system menu and we add that by dragging a Menu item from the Object Library palette onto MainMenu.xib. This would be a menu with three items pre-populated.
Next add a Cocoa Class and call it MenuController, set it to be a subclass of NSObject. This is where we will handle the menu clicks, selection, etc.
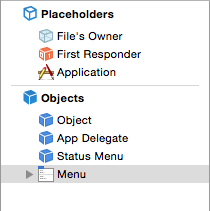
Now add two Objects from the Object Library palette onto the canvas. These will help us set the delegates and manage the interactions. Set the class for one as AppDelegate and the other to MenuController. Set the delegate of the Menu to MenuController. Set the delegate of the AppDelegate to the File’s Owner. Now create an IBOutlet in MenuController.swift that is connected to the Menu and call it statusMenu.
Adding the Images
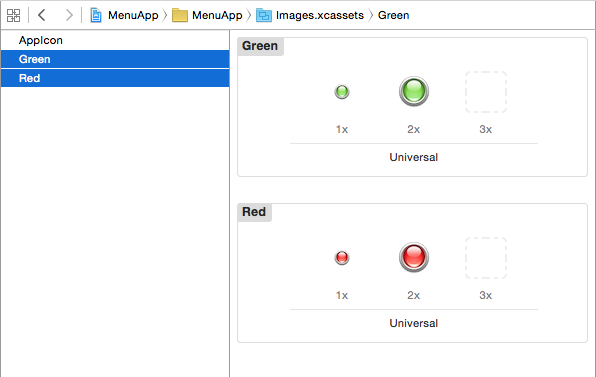
Click on Images.xcassets and add a new Image set, call it Red, add another Image set and call it Green. Add the @1x and the @2x Images respectively to the Images.
Displaying the Icon in the StatusBar
Now we need to create an entry into the StatusBar and set our icon. Click on the MenuController.swift and add the line
var statusItem = NSStatusBar.systemStatusBar().statusItemWithLength(-1)
then add the awakeFromNib function as
    override func awakeFromNib() {
        let icon = NSImage(named: "Red")
        icon?.setTemplate(false)
        statusItem.image = icon
        statusItem.menu = statusMenu
    }
We first create an icon from the ImageSet and set it to the statusItem. This is the entry we created in the statusBar earlier. Next we set the menu to be displayed as the statusMenu (the IBOutlet we created). Now if you run the code, a red icon is seen in the status bar and when clicked, a menu pops out with the three items, however they are gray (disabled).
Making the drop-down menu functional
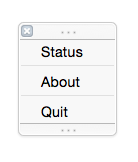
Click on the MainMenu.xib and select the Menu. Change the caption of the items to Status, About and Quit. You might want to also add separators between the options. From the palette, drag to menu separators and place them between Status and About, and About and Quit.
Next switch to the assistant editor and ensure that you see MenuController.swift. Drag from each of the menu items to create IBActions naming them menuStatus, menuAbout and menuQuit accordingly.
Let’s add the code for Quit first as
    @IBAction func menuQuit(sender: AnyObject) {
        NSApplication.sharedApplication().terminate(nil)
    }
Now if you run the code and select Quit, the application exits. However if you notice the dock had an icon, since the app is entirely system menu based, we need to hide the icon.
Hide the Icon
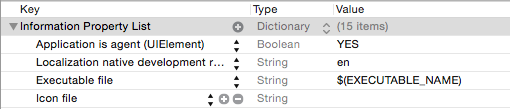
Switch to Info.plist and add a new item, select Application is agent (UIElement) and set it to YES. That’s all, now the Icon will not show in the Dock and you can terminate the application via the menu from the status bar.
Updating the Menu
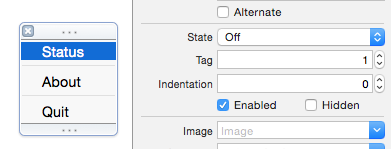
For now, let us replace the text status with the current time (which seems simpler). One way to do so is using a timer, that can update the menu item OR we can update it only when we need to. For this we could use the function validateMenuItem, where we can update the text to the current time. One important thing that we need to do first is set the tag for the Status item to 1, we can then access and modify it via code.
    override func validateMenuItem(menuItem: NSMenuItem) -> Bool {
        if menuItem.tag == 1{
            menuItem.title = "\(NSDate())"
        }

        return true
    }
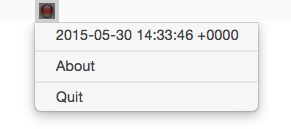
Here’s what we’ve build so far
When we run the code, we can see the icon displayed in the statusbar and the menu drops down when selected and the time updated every time the menu is selected.
Here we come to the end of Part I. In Part II, we shall read a setting from Xcode preferences and change the Icon based on the setting, add a custom view for About. Till next time
Note: The Source code shall be available with the next part of this article.

Views All Time
4349

Views Today
3